2. Installation
Here we will explain to you the different methods to install and activate QuadMenu in your WordPress site.
1: Download the quadmenu-pro.zip file from your account.
2: Open your website’s WordPress admin panel at mysite.com/wp-admin/.
3: In the WP dashboard go to Plugins > Add New.
4: Click on the Upload Plugin button, at the top of the screen.
5: Click the Choose File button and use the popup window to browse for the quadmenu-pro.zip file and select it.
6: Go to Plugins > Installed Plugins and click the Activate button, under the QuadMenu name, in the plugins list.
2.1. Network
1: Download the quadmenu-pro.zip file from your account.
2: Open your website’s WordPress admin panel at mysite.com/network/wp-admin/.
3: In the WP dashboard go to Plugins > Add New.
4: Click on the Upload Plugin button, at the top of the screen.
5: Click the Choose File button and use the popup window to browse for the quadmenu-pro.zip file and select it.
6: Go to the site you want to use the plugin for and then go to Plugins > Installed Plugins and click the Activate button, under the QuadMenu name, in the plugins list.
2.2. FTP
1: To install via FTP you need a FTP client, like FileZilla, installed on your PC and the access data to connect to your server.
2: Download the quadmenu-pro.zip file from your account. This file contains the complete QuadMenu Plugin package.
3: Unzip the quadmenu-pro.zip file, included in the package. This file contains a folder.
4: Upload the folder through the FTP client in the folder wp-content/plugins/.
5: Open your WP dashboard and go to Plugins > Installed Plugins and click the Activate button, under the QuadMenu name, in the plugins list.
2.3. Plugin Activation
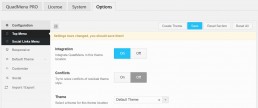
After you install and activate the QuadMenu Plugin you'll be redirected to the plugin options panel.