4.1. Automatic Integration
The following are additionally required of your theme if you wish to integrate QuadMenu automatically, rather than adding a line of PHP to your theme template.
- Proper use of the
wp_nav_menufunction - Use of the
theme_locationsetting within the wp_nav_menu arguments - A properly registered theme location
- No use of the
menusetting within the wp_nav_menu arguments - Modular coding – CSS and JS based on the container ID or class passed to wp_nav_menu, rather than a hard-coded wrapper class
Any properly coded theme will meet requirements 1-4.
If requirement 5 is not met, you may have residual styling or residual scripting from the theme
This means the theme’s CSS and javascript will interfere with QuadMenu’s functionality.
If so, you can just replace it with QuadMenu’s manual integration code.
4.1.1. Quick Start
In your WordPress admin panel, navigate to Plugins > Add New > Upload. Choose the QuadMenu plugin zip and follow the prompts to install and activate QuadMenu.
After plugin activation, you’ll be redirected to the plugin options panel in your admin dashboard. Take in mind that at this point, QuadMenu will have no effect on the front end of your website.
QuadMenu > Options
Here you’ll find the configuration tab where you can configure some general settings.
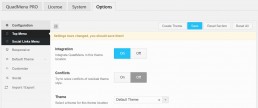
After opening this tab you will discover that each “menu location” has its own instance of options where you can activate the mega menu plugin and select the menu theme.
In this way, QuadMenu allows you to modify the style of each menu location by creating a set of options for each menu location.
In WordPress, theme locations define the theme place where you can insert a menu.

4.1.2. Activate QuadMenu
After plugin installation, you have to activate QuadMenu on your header menu. Usually, this menu theme location is called the Primary Menu or Main Menu, Header Menu or Top Menu.
As each “menu location” has its own instance of options you’ll find a tab for each menu location. Find the tab which corresponding with your header menu and switch On the Integration button.
If you're a Divi user please follow the Divi Integration instructions.
4.1.3. Create Menu
After activating QuadMenu in the desire menu locations you have to go to the WordPress menu dashboard.
Appearance > Menus
A little icon will be shown aside each menu location where you’ve activated QuadMenu.

4.1.3. Create Menu Theme
Once you create the menu you have to create a new theme to change the styles and layout options through the menu options panel.
QuadMenu > Options > Create Theme
After creating a theme, your panel will be reloaded and a new tab will be included to display the set of options of the new theme.
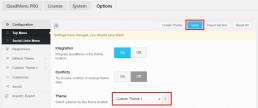
Now you have to go to your active menu location which in our example is called Top Menu and change the selected theme.
QuadMenu > Options > Configuration > Top Menu
Select the new theme and press the save button.

4.1.4. Edit Menu Theme
Now you can start editing your menu style in the tab of the selected theme. Inside the main tab, you can control the display options, related to the menu layouts and the behavior of its elements.
QuadMenu offers you a variety of layouts designed to fit most common needs on modern websites. To understand the layouts behaviour please visit our layouts demo examples.
Inside your theme menu tab, you’ll find other tabs where you can control other aspects of the menu related with the style of the menu
Menu: Here you can customize the style of your menu, with parameters like text color, background, borders, margins, etc.
Sticky: Here you can customize the style of your menu, with parameters like text color, background, borders, margins, etc.
Mobile: Here you can customize the style of your menu, with parameters like text color, background, borders, margins, etc.
Dropdown: Here you can customize the style of your dropdowns menus, with parameters like text color, background, borders, margins, etc.
Animations: Here you can customize the style of your menu, with parameters like text color, background, borders, margins, etc.
